Showing posts with label cooking for two. Show all posts

Tuesday, May 12, 2015

Chicken Stuffed 'Bellas

A recipe! Hooray!

I love simple, easy-to-put-together meals. THIS recipe is one of those!


I love using portobella mushrooms as an entree, they're filling, but not overly heavy like bread or pasta - and they're just downright delicious.

If you thaw and/or cook your chicken ahead of time, this will literally come together in just a few minutes. The longest part is baking them, but even then they are done in about 10 minutes.


One shortcut I've found is this - and it may sound ridiculous, but it's what I do! When I need shredded chicken, I cook it throughly and then put it in the blender for a few rounds. By doing this, I usually have finely shredded chicken in about three seconds. Try it! It's worth it.

My super-key ingredient for this recipe is this:


I first used this when I made chicken marsala awhile back, and it ups the flavor like nobody's business when it comes to cooking with mushrooms. I had to try it in this dish and, even with just a third of a cup, it BLEW MY MIND.


((Note: I was a little afraid to cook with even cooking wine for a long time, then I learned the alcohol cooks out, much to my relief. If you're not comfortable with this, then chicken broth will work fine!))

My pictures of this are terrible quality, but don't let that deter you from trying your hand at this dish. I think you'll be pleased!

Chicken Stuffed 'Bellas
Serves 2

adapted from What'sCookingMexico

What you'll need:

2 medium-sized portobella mushrooms
1/4 cup of butter (1/2 stick butter)
4 oz cream cheese
1 chicken breast, cooked and shredded
1/3 cup marsala cooking wine or low-sodium chicken broth
2-3 tbsp half & half
1/2 tsp garlic powder
1/2 tsp onion powder
dash of crushed red pepper
dash of salt and pepper
Italian breadcrumbs


What you'll do:

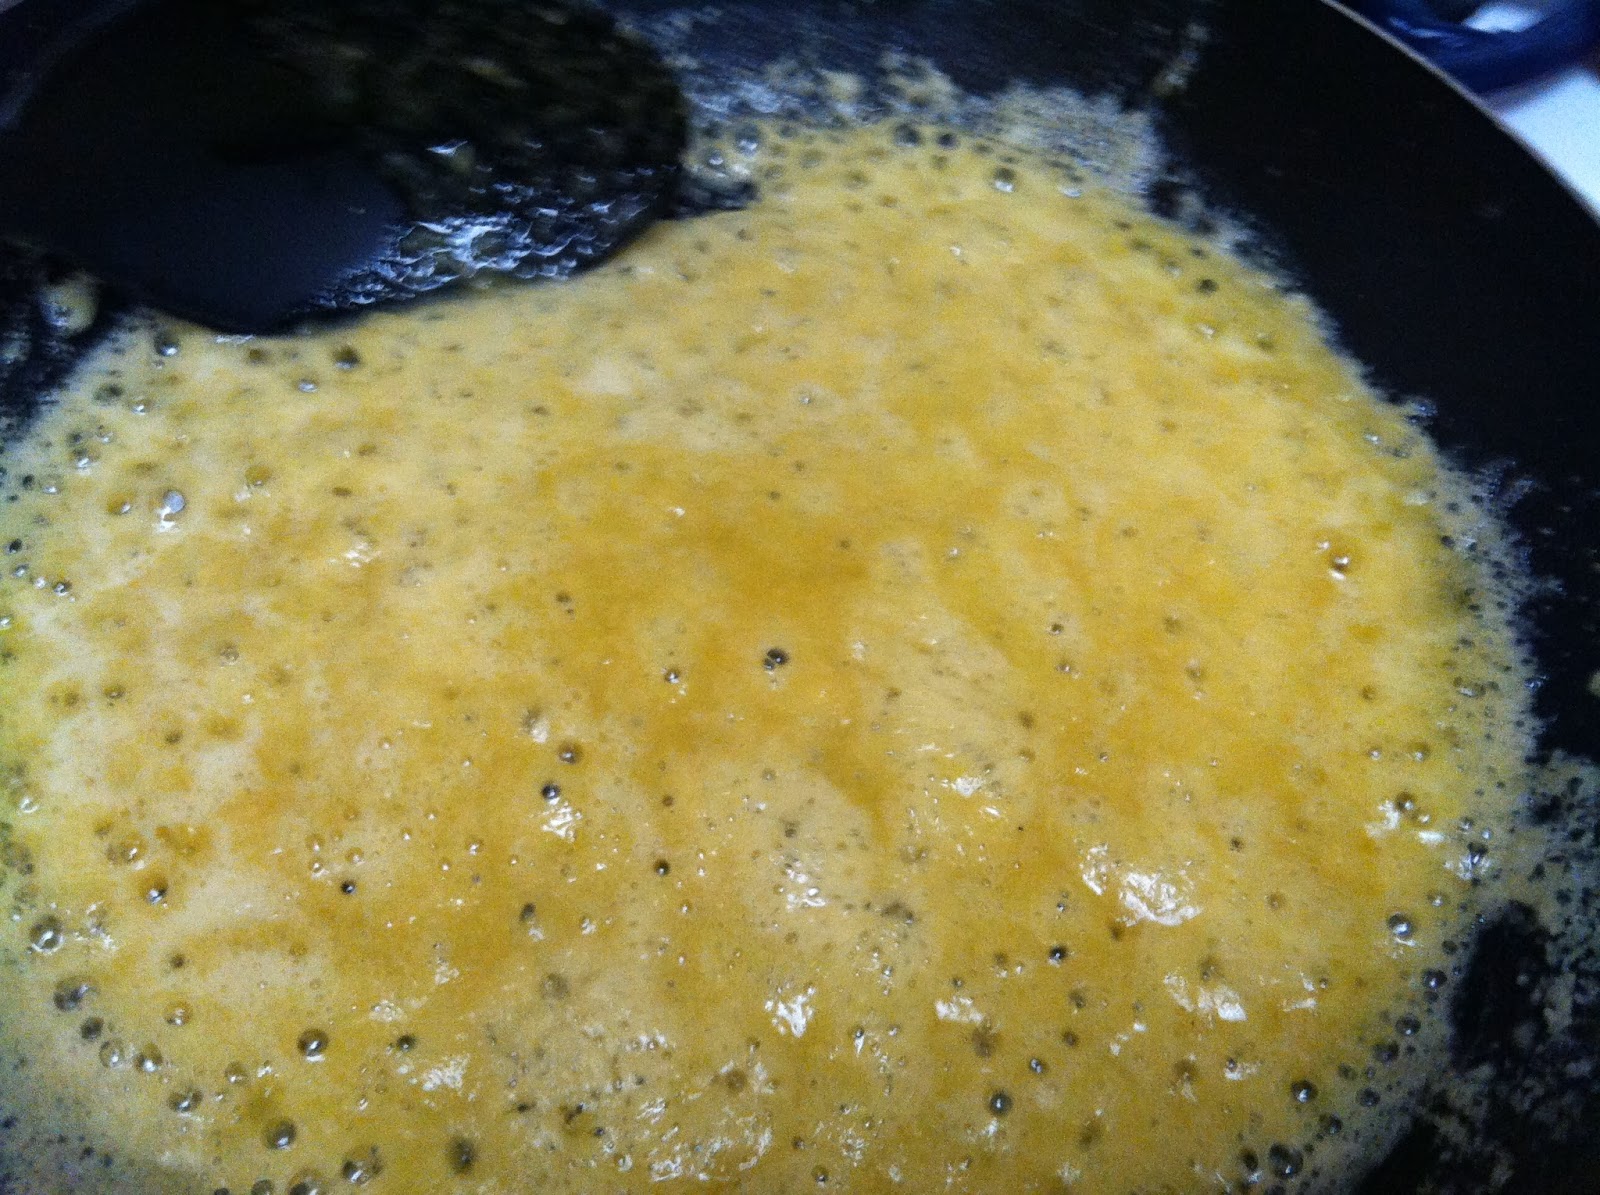
In a large skillet, melt butter and cream cheese. Stir frequently to mix. When each are about halfway melted, add marsala wine (or chicken broth), garlic powder, onion powder, and crushed red peppers. Stir and continue to cook.

Meanwhile, rinse and clean your mushrooms by using a spoon to scoop out the insides. Remove the stems and chop into small pieces, then add to the sauce mixture as it cooks. If sauce mixture looks
"soupy," add half & half. This will make the sauce very creamy, so add a little at a time until it reaches the consistency you prefer.

Place mushrooms in a baking dish or sheet, then fill with sauce mixture. Top with a sprinkle of breadcrumbs and bake for 10 minutes at 350. After 10 minutes, turn on the broiler for about 2 minutes, just enough to let the breadcrumbs start to darken and crisp.

Remove the mushrooms from the oven, let cool for a few minutes, then enjoy!

Thursday, March 26, 2015

Coconut Chicken Tacos

As I type this, the skies are about to open up for a downpour that will supposedly last most of the night, bringing with it the inevitable cold snap that the weatherpeople have been expecting all week.

However, for the past week or so, we've been blessed with some INCREDIBLE springtime weather -- our temps have been in the 70s all week with sunshine every day. It's been a much-needed change in atmosphere.

All of this Springy weather has me craving summertime and beach food, and I've got the perfect recipe to kick off the season.

I made this as kind of a quick, thrown-together meal before church earlier this week, and I'm ridiculously pumped because it TASTES LIKE SUMMER.

This recipe originally came from Creme de la Crumb - but we ended up putting our strips on tacos...because TACOS mean SUMMER and did I mention WE ARE READY FOR IT?

So ready. Sooo so ready.

Also, we kind of (literally) shoved these in our mouths as we were walking out of the door for church, so I have zero pictures. Blogger fail #647.

Fix these with some warm tortillas and topped with sweet and sour sauce and you will be SET. We didn't even need cheese! Seriously, the flavor in these babies are LEGIT.

Summer, come on.


Coconut Chicken Tacos
Serves 2


What you'll need:
2 boneless, skinless chicken breasts
1/2 cup flour
1 tsp Tony's
1/2 tsp garlic powder
Dash of pepper
2 eggs
1 tbsp water
2 cups (1 small bag) coconut flakes
Corn or flour tortillas

What you'll do:
In a small bowl, combine the flour and seasonings. Set aside.

In separate bowl, combine eggs and water, then whisk until just mixed. Set aside.

In another bowl or plate, pour out coconut flakes. Having these "stations" will make prepping so much easier.

Slice chicken breasts into 1/2-inch strips. One at a time, dip in flour mixture, then egg mixture, then roll in coconut. Lay them on a baking sheet lined with parchment paper (or foil, sprayed with non-stick cooking spray).

Bake chicken strips 10-15 or until done in the center. Warm some tortillas and build your taco, topping with sweet and sour sauce.

Monday, February 16, 2015

You Be Johnny & I'll Be June

I can't stop listening to Miranda Lambert's new album, "Platinum." I've basically had the whole thing on "Repeat" since Thursday.

It's just...so...good.

It's keeping me upbeat throughout this crazy weather and lack of sunshine.

You what else is good though?

A pasta dish that doesn't make you feel like you weigh 6,000 pounds WHILE it's busy being pretty delicious.

I made this weeks and weeks AND WEEKS ago, but just didn't get around to posting it. I found it in my phone today and thought HEY WHY NOT because wintery, rainy days just call for pasta sometimes AMIRIGHT?


I've only recently discovered egg noodles. WHY I've never cooked them, I'm not sure, but it probably has something to do with the fact that "egg" and "noodles" just don't sound appetizing AT ALL to me.

BUT --- one (very cold) night I just bit the bullet and tried them anyway because they are CHEAP and I didn't feel like eating frozen vegetables.

YES they are enriched and YES they are probably not the best for you --- but I figure a little enrichment can't be too terrible every now and then, right? Everything in moderation, I'd like to believe.

Have you ever had beef stroganoff? It's never really appealed to me, but I think I had it once in college and it wasn't too bad. This version is made with turkey though, as well as a few other seasonings, and it is SO MUCH BETTER. Just be sure to season it because you do NOT want this dish to be bland. And those mushrooms? They add SO MUCH. Please add mushrooms and you won't regret it :)


The SAUCE is the treat in this dish. It's easy and fast to throw together and really the need for those aforementioned enriched noodles is just a minimum. And THAT means we can feel a LEETLE better about eating said noodles and just enjoy the dish all around.

This all came together in about 30 minutes or less. Which COMPLETELY made up for the hour-long wait in traffic trip to the grocery store it took to make it happen.

Definitely something to consider for a rainy, chilly Monday. Happy Day, friends!


Turkey Stroganoff

((serves 2))


What you'll need:
1/2 lb of lean, ground turkey (I use 93/7)
1 small can of cream of mushroom soup
6-8 small mushrooms, rinsed and chopped
1/2 cup sour cream
1/2 tsp garlic powder
1/2 tsp onion powder
1 tsp extra virgin olive oil
dash of basil and oregano (or Italian seasoning)
salt and pepper, to taste
Tony's (or other cajun seasoning), to taste
1-1.5 cups of cooked egg noodles

What you'll do:
Saute' mushrooms in olive oil with garlic, onion, and Italian seasoning. Once mushrooms are fully cooked, remove and add turkey. Turn heat to medium, season with salt and pepper, and cook until completely done, about 10-15 minutes. Turn heat down to medium-low and stir in sour cream and cream of mushroom soup. If sauce is too thick, add a little water or chicken broth until it reaches your preferred consistency (I like mine slightly soupy). Season with Tony's or other seasoning to taste, then serve hot over warm egg noodles.


Monday, February 9, 2015

Sunday Shrimp & Grits

Is anybody else completely obsessed with "Uptown Funk"?

I can't help it. I'm hooked. It's basically been the thing that's getting me through this manic Monday!

But it's all good. Because you know what ELSE I'm currently hooked on?

Shrimp and grits.

Thaaaaaaat's right.

I'm cooking again!

Actually, I cook A LOT. I've just been really boring as of late.

So whether it's the 60+ -degree weather and sunshine we had this weekend, or just that I got tired of eating chicken, SOMETHING reallllly motivated me to get a little creative in the kitchen.

Okay let's face it - it was Pinterest.

I LOVE shrimp and grits. It's one of my favorite dishes to order when we go to legit seafood restaurants down on the Coast. Nobody does shrimp and grits like the South, people.

But I've never really attempted to make it myself. I've made a version or two with a few other fun ingredients added, but guess maybe I was just afraid it wouldn't be the same? Plus, when I want shrimp and grits, I REALLY WANT SHRIMP AND GRITS -- so to get all pumped about making it and eating it -- and then have it NOT turn out? Well, that's just heartbreaking.

But yesterday was different. Oh, so different. I'd found the recipe via Pinterest on Saturday night and it was all I could think about come Sunday morning. My tastebuds couldn't take it anymore, folks.

So, after church we threw some thinks in a skillet, cooked some grits, and hoped to goodness it would taste all right. And you know what?

It was a pretty fantastic recipe.

...although I'll spare you the horror of my photography skills, because it's really hard to make shrimp and grits look pretty with an iPhone camera and bad lighting ;)

You can find the original recipe here, courtesy of Southern Living Magazine (speak to my heart!), but I put my own spin on it below. It actually calls for very practical ingredients - I had basically everything on hand already except the shrimp.

Careful, though -- this dish is super filling! It's nice and cheesy and starchy and seafood-y all at once. And it's wonderful :)

Happy Monday, friends!


Sunday Shrimp & Grits

((adapted from Southern Living Magazine))
((source))

Serves 4

What you'll need:

2 slices of turkey bacon
1 lb of medium-size shrimp (I used frozen, fully cooked, de-veined, tail-on shrimp)
1/4 cup flour (I used self-rising, and it worked fine)
1 cup mushrooms, sliced
2 tbsp extra virgin olive oil
1 cup low-sodium chicken broth (plus a little more, just in case)
garlic powder
pepper
salt
Tony's

Grits:
1 cup Quick Grits
1 can low-sodium chicken broth
1/2 cup milk
1/2 cup half-and-half
1/2 cup shredded, mixed blend cheese (I used the "Pizza Blend")
1/2 cup shredded mozzarella cheese
2-3 slices Provolone cheese.
dash of salt
dash of pepper
dash of Tony's

What you'll do:

In a large, non-stick skillet, heat about a half tablespoon of oil to medium heat. Cook the bacon until crisp, then set the strips aside (drain on a paper towel if needed, but turkey bacon typically isn't very greasy). Do not clean the skillet.

Saute the mushrooms in the bacon drippings (if any), adding about a teaspoon more oil if needed (you can also add just a small pat of butter here). Sprinkle with pepper and garlic powder to taste. Cook until tender.

If needed, clean/defrost/de-vein/de-tail shrimp, then season with salt, pepper, and Tony's to taste. Dredge in flour, then add to skillet to cook with mushrooms.

When shrimp begin to brown, add chicken broth and season to taste. Let this mixture cook for about 5 minutes, then turn heat to low. This should be very gravy-ish, but not too liquid-y. If it gets too dry, add a little more broth until it reaches the right consistency.

Serve piping hot on top of grits.

For the grits:
Combine broth, milk, and salt in a medium saucepan and bring to a boil over medium-high heat. Mix in the grits a little at a time, stirring with a whisk. Once everything is combined, turn heat to low and let this cook for about 10 minutes, stirring occasionally, or until thick.

When grits are fully cooked, add in the cheese and season slightly with Tony's as you stir.

Once everything is evenly combined, spoon grits into your bowl and top with mushroom and shrimp mixture. Crumble bacon on top and enjoy!


Thursday, January 15, 2015

Cupcakes Times Two

Happy belated New Year party people!

Let's get down to business.* Sometimes you just need a cupcake.


And if you're anything like me, sometimes you just have to bake. Most of the time, when I really want to unwind I have to do one of two things: A) Bake B) Take a nap.

Life is GREAT if I get to do both.


I don't know what it is, but baking is really relaxing for me. I'm not that great at it - and I'd love to get better - but I just love it. Just taking time to not have to think about anything in the world except for mixing, stirring, piping, etc., is very calming. I'm in my "zone" when I'm in the kitchen.


A day or two after Christmas, I was feeling a little homesick and sad that the holidays were basically over. Our apartment was clean (for once), and I wasn't quite ready to take down the Christmas tree, but I just had to DO something.

So I baked.

And you know what? It felt GOOD. It felt happy.

I'd recently stumbled on this recipe from Jessica at "How Sweet It Is" that made only two cupcakes, which was perfect considering we were still coming off of all of the holiday meals and snacks :)

But the trick was making the icing. I wanted to bust out the decorating kit and skills from my class back in August, but WITHOUT having to make icing that would cover an entire cake.

So, after a little digging, I used Jessica's vanilla buttercream icing with the measurements from Dessert for Two.

WIN.

I'll admit, I was pretty happy with how they turned out.


That is, until this happened.


But that's another story for another day :) At least it gave us a nice laugh.


Happy Thursday, friends! Let's rock on into Friday :)


Find the "Cupcake for Two" recipe HERE.


Vanilla Buttercream Icing for Two
recipe from How Sweet It Is, measurements from Dessert for Two


What you'll need:
4 tbsp butter (room temperature)
3/4 cup powdered sugar
1/4 tsp vanilla extract
1 tbsp of milk (or more, if you prefer a thinner texture)
sprinkles -> A MUST

What to do:
Cream butter with an electric mixture until smooth and creamy. Slowly add in powdered sugar and slowly continue to mix. Increase speed slightly and add vanilla, keeping everything in the center with a spatula (with such a small amount, it will spread very thin, very quickly). If the mixture gets a little too thick, add milk a little at a time until satisfied. Frost onto cupcakes once they are cooled.


*To DEFEAT...the Hunnnnzzzz!!!!


Monday, September 15, 2014

Quick & Easy Weeknight Meal: Steak Tacos

Hola peoples!

Something WONDERFUL happened down South this weekend.


We had a nice little cool snap and it FINALLY felt like fall!

Actually, it felt like Christmas to me, but maybe that's just me.

I was pumped. A chilly start to the morning meant a FANTASTIC run on Saturday.


We originally only planned on a four-mile run, but the weather gave me so much energy that I couldn't stop and cranked out another mile. It felt FANTASTIC and I could have stayed outside all day. So serious.

All the Fall fans say HEYYYYYYYY!!!!!

We're a little more than 15 weeks out from our St. Jude race, so we're moving slowly but surely forward with our training. It really helps that we've found a nice running group for Saturday mornings - we keep each other accountable AND entertained :p

Despite some way, way, waaaaayyy too early mornings during the week, it feels like we are finally settling into a nice routine lately - and I, for one, couldn't be more thankful! I actually really look forward to getting up early on Saturdays to head out for a run, and BONUS because we're usually done with most of our errands by noon. Free day = SCORE.

Most of the week's dinners end up being quick "go-to" recipes (in hopes of being asleep before/by 9pm!), but I have been able to experiment a little here and there. One such experiment happened last week:


...and it was DELIGHTFUL.

I originally bought these Simple Truth Fajita Strips to use in a batch of stir-fry, but changed my mind one evening when I couldn't stop thinking about guacamole.


Sooooooo steak tacos it was!

I don't know if I've ever tried these fajita strips before last week, but for the next 10 or so weeks they JUST MIGHT be a staple in my fridge! Everything came together in LITERALLY about 10 minutes. If that. Our bellies were fed, our tastebuds satisfied, and we were relaxing on the couch before 7:30 that night.

We had no idea what to do with ourselves. I mean, free time? Really? Is that even a thing anymore on a weeknight?


I sprinkled only a little seasoning* with some fresh cilantro on top (A MUST), then wrapped everything in corn tortillas since they are a bit lighter, but these tacos would be just as great with whole wheat or full-fledged flour torts. And I DEFINITELY recommend making the guac alongside of this - there's just something about fresh guacamole that makes tacos taste even more incredible.


TACOS FOR LIFE.


Quick & Easy Steak Tacos

Serves 2


What you'll need:
1 package of Simple Truth Sliced Fajita Strips (fully cooked)
4 corn tortillas
1 tsp extra virgin olive oil
juice of one lime
chopped cilantro, to taste
dash of cayenne pepper*
dash of onion powder*
dash of chili powder*
dash of cumin*
salt/pepper to taste
suggested toppings: mozzerella cheese, chopped tomatoes, fresh guacamole, hot sauce

What you'll do:
Heat oil on medium heat until hot, then stir in fajita strips and season with powders, peppers, and lime juice. Stir to coat, then turn heat down. Serve hot on warm tortillas with preferred toppings.


*I use these ingredients together frequently, so I keep them mixed in a small jar for easy access :)


Note: As part of our team's participation in the upcoming St. Jude Half Marathon in Memphis, we're aiming to raise a few dollars for the organization as well. Every dollar that we raise will go toward helping families whose children are being treated at St. Jude Children's Hospital, so that their focus can be on getting their child well again - and not on expense. If you're interested in contributing to our little pot, check out my page and read more about it!


Friday, August 22, 2014

Amazing Coconut Shrimp

Folks - it's the WEEKEND (finally) and this party is about to get started!!!!!!

I'm ridiculously pumped to share this recipe with you - it's pretty much the perfect food to close out the summer.


A couple of weeks ago, I was trying to plan out our Sunday lunch and I was coming up with NOTHING. This was smack dab in the middle of my cooking rut (remember the Jello incident?), and there was not one thing that came to mind that sounded even remotely appetizing. I pretty much spent that entire Saturday night immersed in our favorite cookbooks, magazines, blogs and even Pinterest to get some sort of idea but NOPE - nothing.

I can't exactly let go of these sorts of things. When it comes to food, I MUST have a PLAN. ICANTLETGO.

Which explains why I was up until 1 a.m. reading cookbooks from cover to cover.

All I kept thinking about was how bad I wanted to go back to the beach. Because can we agree that the beach pretty much has some of the best food ever?


And the best views, obvi.


As thoughts of the beach kept creeping into my mind, my tastebuds started longing for something...seafood-y. Which led to shrimp. Which made me think of the time I ordered coconut shrimp at Margaritaville once in college.

Light bulb.

After much MUCH research (I had high standards, you see. Merher), I stumbled on the Crème de la Crumb blog ---- and her AMAZING recipe for coconut shrimp tacos.

Even better? It was an EASY 30-minute recipe from start to finish, practical ingredients, and...wait for it....BAKED.

Nope - not fried and unhealthy --- BAKED.

It's an explosion of all kinds of goodness that parties all night long on your tastebuds. Seriously -- the flavors are OUT. OF. THIS. WORLD.

And don't even get me STARTED on THE SAUCE. The sauce is just...indescribable.

It's JUST. SO. GOOD.

Probably my favorite thing that's come out of our kitchen since the beginning. And I'm not even exaggerating.


We ate it alongside some fresh homemade guacamole, lime and cilantro-seasoned black beans, and fresh corn. It was PERFECT.

In fact, we enjoyed the shrimp so much we kept forgetting we actually had tortillas to make tacos. I think we both just kind of dove in to the shrimp alone after only one taco.

But hey - whatever works AMIRIGHT?????

Just writing about this dish has me excited all over again. The results were even better than I anticipated, and I'm completely convinced it's what pulled me out of my crazy boring rut.

Your summer probably won't be complete until you make this. It takes a little bit of prep work (and only a few dishes ;) ) but it's totally worth it. Trust me on this, okay?

You'll love it. And then we can be completely obsessed with it together.

Happy obsessing!


Crispy Coconut Shrimp with Sweet Sauce

Serves 2-4
(adapted from Crème de la Crumb)
 
What you'll need:
 
Shrimp:
1 lb shrimp (fresh or frozen), peeled and de-veined with tails removed
4 eggs
4 tbsp water
1/2 cup flour
1 tsp garlic powder
1/2 tsp chili powder
1/2 tsp cayenne pepper
2 cups coconut flakes (I used a whole bag, which ended up being slightly more than 2 cups)
 
Sauce:
1 cup coconut milk
juice of 1 lime
2 tbsp white vinegar
1/2 tsp salt
1 tablespoon sugar
1/4 tsp chili powder
1 tbsp extra virgin olive oil
2 tbsp finely chopped cilantro (or more, if you prefer #iheartcilantro)
a few dashes of your favorite hot sauce
 
What you'll do:
Spray a baking sheet with cooking spray and set aside.
 
Combine eggs and water in a small bowl and whisk until smooth and combined. In a separate bowl, mix flour, garlic powder, chili powder, and cayenne. Pour coconut flakes into another bowl.
 
Line your bowls in this order: flour, eggs/water, coconut.
 
Toss shrimp in flour mixture, dredge in egg mixture, then coat with coconut flakes - in that order.
 
Line shrimp on baking sheet, then bake at 400 for about 15 minutes or until shrimp are thoroughly cooked and coconut flakes start to turn a "golden brown" color.
 
While shrimp are baking, combine all sauce ingredients in a small bowl and whisk until combined. Place in refrigerator to chill until time to serve.
 
These shrimp taste excellent by themselves or on a taco with fresh salsa (I recommend either pineapple or mango salsa), guac, and fresh cilantro. Use the sauce as a dipping sauce, or drizzle on a taco. Either way, you can't go wrong with these babies. They're AMAZING.
 
Kudos to Tiffany from Crème de la Crumb for developing this recipe - go check out her GORGEOUS pictures, too!


Wednesday, August 20, 2014

Toasty Ham Sandwiches

Super Simple Supper Alert!

And it's delicious.

Trust me on this, okay?


WEDNESDAY IS ALMOST OVER GUYS!

Which means it's almost Thursday, so it's basically Friday right?

Definitely.

WEEKEND!!!!!!!!

Seriously CAN. NOT. WAIT.

....

But BACK TO THESE SANDWICHES!

And these incredible buns of glory!


NO that's not the name of my future workout video - it's what I call THESE BABIES:


The magic is in the bread -- I LOVE Kings Hawaiian Sweet Rolls. THEY are what really make the dish. Seriously - can we just take a moment to relish the mere SIGHT of these things?


If you've never tried these babies, please know that they will change your life and your expectations of bread forEVER. You just HAVE to.

One of my co-workers found the key to my heart a few weeks ago and handed me this recipe, declaring it was a huge hit with her family. I tweaked it slightly because I'm AWESOME like that and NO REGRETS. Hubs and I devoured them at suppertime and had to straight up put them in the fridge and OUT OF SIGHT before we ate them all.

Thankfully, we were able to devour them yet again at lunch the next day. If ever there was a sandwich you'd want to eat again and again, believe you me THIS IS IT.

Am I being slightly dramatic considering this is a SANDWICH? And a MINI SANDWICH at that?

Probably.

But just you wait 'enry 'iggins. Just. You. Wait.

You'll fall in love too.

Toasty Ham Sandwiches

Serves 2-4
(leftovers for 2)

Pack of 12 dinner rolls (King's Hawaiian if you're awesome)
1/2 to 3/4 stick of butter or margarine, melted
1 tbsp dijon mustard
2 tbsp Worcestershire sauce (<- how DO you say that?)
1/2 tsp black pepper
1/2 tsp onion powder
1/2 tsp garlic powder
1-2 tbsp poppy seeds (your preference)
1 pack of thinly sliced honey ham
1 pack of provolone cheese

Spray a baking pan or casserole dish with non-stick spray or lightly rub with a little butter/margarine. Separate rolls and line pan with the bottom portions - rolls should be close together. Layer with ham, cheese, then more ham. Top with the top layers of bread (it's okay if rolls are touching!). 

Mix remaining ingredients, then pour evenly over rolls. Back at 350 for roughly 15 minutes or until cheese is melted. Dinner is done!

Fun option: Spread dijon mustard on the rolls before layering ham and cheese. YUM!


I want them IN MY BELLY.

Monday, August 18, 2014

Monday Mushroom Pizzas

I told you I started cooking again --- and here's the proof!

Invisible Internet Friends...I give you:


Portobella Mushroom Pizzas!


Although I've tweaked it a little, I can't exactly take complete credit for this one. It's actually a recipe from when I worked on THIS SHOW way back when. It was one of my favorites of that season and I make it at least once or twice a month. It's boy-approved, too, because the Hubs LOVES it.

It's so super simple to make, and what takes the longest is just cleaning out the 'bellas.

Which, let's be honest, cleaning two of them takes about two minutes, tops.

Fast supper? Coming right up.


I've used both chopped fresh tomatoes and canned diced tomatoes, depending on what I have on hand (sometimes a combination!) - and both will work fine. Occasionally I'll have leftover sauce and I'll put it over fish or chicken or whole wheat pasta the next day, and it still tastes just as good!

And BONUS POINTS because it's super healthy and tastes like delicious little drops of fungi.

Too far? Yeah, probably. But trust me on this. You'll love it.

At least I hope so.

You won't regret it!

And a little birdie once told me this is a gluten-free recipe. If you're into that sort of thing. So try it out! It'll be fun :)


Portobella Mushroom Pizzas

Serves 2


What you'll need:
2 medium-sized portobella mushrooms
2 whole tomatoes (or 1 can of low-sodium diced tomatoes)
1 tbsp extra virgin olive oil
1 tsp extra virgin olive oil (separate from previous)
1 tsp garlic powder (NOT salt!)
half tsp garlic powder (separate)
1 tsp onion powder (NOT salt!)
half tsp onion powder (separate)
2 tsp tomato paste (tomato sauce will work, too!)
1 tbsp water
2 tbsp part-skim mozzarella cheese
cracked red pepper, to taste
black pepper, to taste
dash of cayenne pepper
dash of oregano
dash of basil

What you'll do:
Clean the mushrooms by first twisting off the stems (set these aside), then using a spoon to gently scrape off the gills (you won't need these). Rinse thoroughly. Heat 1 tbsp extra virgin olive oil in a skillet on medium heat and sprinkle in garlic and onion powder. Sauté mushrooms in mixture for 2-3 minutes (longer if needed), flipping to give both sides flavor.

In a separate skillet, heat 1 tsp oil on medium heat with half a tsp of garlic and onion powder. Once heated, add diced tomatoes and stir until lightly coated in oil mixture. Let simmer, adding 1 tbsp water as tomatoes begin to cook down. NOTE: You may need an additional tbsp of water, depending on the consistency you prefer for your sauce. Add cracked red pepper, black pepper, and cayenne pepper to taste and stir. Turn heat to low once you've reached your preferred consistency and taste.

Meanwhile, remove mushrooms from skillet and place in a baking dish or cookie tray. Keep heat on skillet medium low. Chop the stems that you removed earlier and sauté in leftover oil in skillet. If you need to add a little more, add about half a tsp at this point.

While stems are cooking, assemble your "pizzas." Place 1-2 tbsp of sauce on the bowl side of mushrooms, then add a sprinkle of mozzarella cheese. Add mushroom stems and top with a dash of oregano and basil. Bake at 350 for about 15 minutes or until cheese is completely melted.

Friday, August 15, 2014

Crock Pot Pulled Chicken

It's FRIDAY!!!

And I'm still only slightly in denial that it's not quite 5:00 yet ------ My brain prettttty much checked out at lunchtime.

But that's okay because GUESS WHAT YOU GUYS I'M FINALLY COOKING REAL FOOD AGAIN!!!!!!!!


...unless you don't count the Crock Pot as "cooking" - but since it DOES taking some planning and preparation, I definitely do.

This is the easiest recipe EVER. No joke. I just made this yesterday so it's perfect for the weekend when you'd rather be outside enjoying the beautiful weather rather than cooking!

It's also a HUGE HELP for the days that you know will be long and tiring - much like yesterday was for us! We didn't get home until after 8:30 last night - so the fact that supper was ready and waiting on us was a delicious RELIEF.

If you don't know me, then you must know this: I love BBQ. As in, ABSOLUTELY LOVE it.


I've never made pulled chicken or pork before now because it just seemed like a long, drawn-out process, but when Julie of PBfingers posted her easy Crock Pot method, I couldn't believe I'd never tried it before.

I used two legs and two thighs (dark meat YEAH), but you could easily sub chicken breasts if that's what you have on hand.

I let the chicken thaw out overnight, so all I had to do in the morning was put it in with two cans of chicken broth and some seasoning and turned it on Low. It only needs 8 hours to cook, but the longer it cooks, the juicer it gets, and the more it falls apart! Side note: We were gone for over 12 hours yesterday --- so that chicken was TENDER.

Once we got home, I just drained the chicken, separated it a little more, and mixed it with some fabulous BBQ sauce. Done.

Hubs and I are currently on a quest to find the best BBQ sauces around, so about once a month we'll grab a new brand to try. This month's challenger:


Sticky Fingers Carolina Sweet! At this point, it's the one to beat. It's sweet, but it's got a nice kick to where it's just a little hot, but not so much so that you can't enjoy the flavor. My kind of sauce, exactly! :) You can guarantee there WILL be more in our future.


Side note: The runner up at this point is Cheerwine BBQ sauce that a friend of ours gave us a few months back. Hubs lived in North Carolina for awhile (where Cheerwine is made), so he's QUITE the fan. ((We even toasted with it at our wedding!))

((We toasted with Cheerwine, not with the BBQ sauce))

((Although that would have been delicious))


We grabbed a few slices of the Nature's Own Sandwich Rounds and made BBQ Pulled Chicken sandwiches (less calories = more room for MORE BBQ!) - and it pretty much blew my mind at how delicious it was. I even added some dijon mustard for an extra splash of flavor. YUM.


Bottom line: I HIGHLY recommend that you do this sometime in the near future. You shan't regret it - unless you're allergic to chicken or awesomeness or something.


Now let's celebrate because IT'S FRIDAY and the kitchen is my friend again!!!!!


Crock Pot Pulled Chicken

From the PBfingers blog
Serves 2-4 hungry folks

What you'll need:
Chicken - breast, thighs, legs, etc. (I used 2 thighs, 2 legs)
2 cans of low sodium chicken broth
2 cups (at least) of your favorite BBQ sauce
Seasonings of your choice (I used salt, pepper, and Tony's)


What you'll do:
Thaw chicken completely and place in a crock pot. Season to taste, then cover in chicken broth. Cook on LOW for 8-12 hours. Remove chicken (be sure to pick out the bones!) and place in serving dish. Pull apart with tongs or a fork, then cover with your favorite BBQ sauce. The more sauce, the better!

Tastes great on a warm bun with dijon mustard and a dash of hot sauce!


Question:

What are your recommendations for our BBQ sauce tasting????

Friday, February 28, 2014

A Cajun Treat: Crawfish Pie

Boy do I have a recipe that's going to knock your socks off.

I'm not even kidding! Crawfish season only comes once a year - and in the South it's a HUGE DEAL. Fortunately you can usually find it frozen in the off-season, unless you're like me and live in The City and have had withdrawals for almost 3 years now!

I'm so serious when I tell you the only thing on my Christmas list last year was that my mom buy frozen crawfish for me the next time she saw it in the store.

And ohhhhh she did.


Best Christmas ever.

My tastebuds have been begging - downright BEGGING - for this Crawfish Pie recipe for months now, and last week I finally broke down, dug out the ol' New Orleans cookbook, and defrosted one of the packages of crawfish tails.

I'm saver, not a spender!

It was soooo worth it. A warm, fluffy crawfish mixture baked into a flaky pie crust -- YIKES I may have to make this again!


If you can get your hands on some crawfish {fresh or frozen}, the rest of the ingredients are really practical and things you probably have on hand already.

The trick is to get a good roux going once you start cooking. It's just a simple mixture of butter and flour over low heat until it's a nice golden brown:


Looks gross and bubbly, right? That's when it's ready! This will be the base of your mixture, and from there you can add in all of your seasonings, veggies, and crawfish!

I can't even begin to describe how this made my night. It doesn't look that pretty, but I guarantee you the taste is amazing. My mouth is watering all over again!


Mmmmm....


MMMMMMMM!!!!


Hope you enjoy this, folks. It's filled with all sorts of Cajun goodness.


Crawfish Pie

Adapted from The New Orleans Cookbook
Serves 2-4


What you'll need:

1 stick butter
1/4 cup flour
2 tsp chopped onion (or onion powder)
2 tsp garlic powder
1/3 cup chopped green pepper
2 tbsp parsley
2-3 stalks of celery, chopped
2 tbsp chopped green onions (optional)
1 tsp salt
1 tsp pepper
1/4 cup heavy cream or half-and-half
1 package frozen crawfish tails (or ~1 lb fresh crawfish)
1 frozen pie shell, thawed
Cayenne pepper, to taste
Tony's, to taste


In a heavy non-stick skillet, melt butter over low heat. Add flour a little at a time, cooking slowly and stirring constantly - DO NOT walk away, as this will burn very easily! Continue stirring until a light golden roux begins to form. Add the onion, garlic, green pepper, parsley, green onions, and celery, then continue stirring until vegetables are soft. Add salt, pepper, cayenne, cream and continue to stir.

Add crawfish tails to the mixture and cook until they are tender, which may take between 12-15 minutes. Pour mixture into pie shell and bake at 350 until crust is a nice golden color and filling is slightly firm.

Allow the pie to cool, but serve HOT and enjoy!

Wednesday, November 13, 2013

The First Thing I Cooked as a Mrs.

Oh boy, peoples. Winter has arrived.

Over the span of approximately two weeks we experienced some lovely Fall weather, only to grab our jackets and scarves to brave the sudden onset of winter!

It's like they say -- If you don't like the weather in Mississippi, it's okay - it'll change in a few days anyway.

But you know what? I like it. I don't mind it one bit.

It's given me reason to bust out my warm comfy clothes (hellooooo stretchy pants and hoodies!), my favorite soup and comfort food recipes, and Bing Crosby's version of "It's Beginning to Look A Lot Like Christmas."

I broke my own rule this year!!! I normally avoid Christmas music until Thanksgiving but this year --- nah! I'm taking a walk on the WILD SIDE and listening two weeks BEFORE!


Oooh....


But with the weather changing and whatnot, I thought this would be as good a time as any to tell you the story of the first thing I cooked for my husband after returning from our honeymoon:

Homemade Chicken Soup with Veggies

Not exactly what we planned, seeing as how we returned to 80-degree heat and boxes upon boxes of belongings to move into our place, but it worked.

You see, after a lovely honeymoon of things like this:


this...


and THIS...


...We both woke up in the wee hours of the morning feeling some kind of sick. The Plane Crud, as I have oh-so-lovingly deemed it.

"Juuuuicce!!!!"  The Mister said, unable to breathe through his nose and coughing up a storm. "I just need some juice!"

So off we went, at roughly 5:30 a.m., to the nearby grocery store to buy juice, popsicles, and medicine.

...only to find out it didn't open until 6 a.m.

But could we wait that long? Nope. When you're sick, you just need juice. PRONTO.

So we hit the road again, a few miles down the road to the WalMarts, which, mind you, is slightly creepy at that hour of the morning.

That's when it hit me. Somewhere in the depths of my messy box of recipe cards, I remembered there was a recipe for homemade chicken soup guaranteed to make any sick person feel better - the chef himself said so!

So about 45 minutes later, we loaded our car with WAY MORE bags than we planned (crazy WalMart curse!), and a few bottles of juice that we cracked open on the way home.

Sure, it would have been faster and cheaper to go with a can, but the over-achiever in me was NOT about to let the first thing I cooked for my new husband be a can of soup. That's for amateurs, right?

It's probably for people like us that day that were sick and just really needed soup -- and maybe I should have, but I'm not ashamed! Because truth be told, we both felt better by that evening.

And the soup was delicious. No joke.

So now that you know my little story, and now that you're feeling the first chills of the winter season, I present to you The Recipe...this homemade chicken soup sure to cure any cold you may have.

Or at least make it easier to deal with, anyway.

Even if you're not sick, it's definitely good for your tummy on cold nights. Don't be afraid to add more veggies than what the recipe calls for -- I usually eyeball it anyway. The more veggies, the better!

Just give yourself a good hour to prep/cook it, though. It's totally worth it.

...and don't forget the juice =)


Homemade Chicken Soup with Veggies

Serves 2-4 sick folks
Total time: About 1 hour
View original recipe here


1-2 boneless, skinless chicken breasts (depending on size) - cooked and cut into chunks
2 cups of low-sodium chicken broth, plus one extra cup
3 red potatoes
1 cup milk (skim is best, but whole will work fine)
1/2 tbsp of EVOO
1-2 tbsp of garlic powder, depending on taste
2 whole carrots, chopped
2 celery stalks, chopped
chopped onion or onion powder, to taste (I used about 1.5 tbsp)
1 tbsp basil
2 tbsp oregano
dash of cayenne pepper, to taste
dash of Tony's, to taste

Slice potatoes and place in a small sauce pan with chicken broth. Cook until potatoes are soft enough to mash, then remove potatoes. Stir and slightly mash potatoes in a bowl with milk (I left mine slightly chunky) and set aside.

In a separate, larger pot, place oil, garlic, onion, veggies, basil and oregano and cook until onions are translucent. If using onion powder, cook until celery and carrots are slightly soft. Add leftover chicken broth (from potatoes), stirring until thoroughly mixed. Let this mixture come to a boil, then add your milk and potato mixture. This will make the soup much thicker; if you prefer a more brothy soup, add the extra cup of broth. Let soup cook for 5-10 minutes, or until everything is evenly mixed and combined.

Add a dash of cayenne pepper and a little Tony's (helps with a stuffy nose!) and serve hot. Serve alone or over brown rice.