Showing posts with label comfort food. Show all posts

Thursday, March 26, 2015

Coconut Chicken Tacos

As I type this, the skies are about to open up for a downpour that will supposedly last most of the night, bringing with it the inevitable cold snap that the weatherpeople have been expecting all week.

However, for the past week or so, we've been blessed with some INCREDIBLE springtime weather -- our temps have been in the 70s all week with sunshine every day. It's been a much-needed change in atmosphere.

All of this Springy weather has me craving summertime and beach food, and I've got the perfect recipe to kick off the season.

I made this as kind of a quick, thrown-together meal before church earlier this week, and I'm ridiculously pumped because it TASTES LIKE SUMMER.

This recipe originally came from Creme de la Crumb - but we ended up putting our strips on tacos...because TACOS mean SUMMER and did I mention WE ARE READY FOR IT?

So ready. Sooo so ready.

Also, we kind of (literally) shoved these in our mouths as we were walking out of the door for church, so I have zero pictures. Blogger fail #647.

Fix these with some warm tortillas and topped with sweet and sour sauce and you will be SET. We didn't even need cheese! Seriously, the flavor in these babies are LEGIT.

Summer, come on.


Coconut Chicken Tacos
Serves 2


What you'll need:
2 boneless, skinless chicken breasts
1/2 cup flour
1 tsp Tony's
1/2 tsp garlic powder
Dash of pepper
2 eggs
1 tbsp water
2 cups (1 small bag) coconut flakes
Corn or flour tortillas

What you'll do:
In a small bowl, combine the flour and seasonings. Set aside.

In separate bowl, combine eggs and water, then whisk until just mixed. Set aside.

In another bowl or plate, pour out coconut flakes. Having these "stations" will make prepping so much easier.

Slice chicken breasts into 1/2-inch strips. One at a time, dip in flour mixture, then egg mixture, then roll in coconut. Lay them on a baking sheet lined with parchment paper (or foil, sprayed with non-stick cooking spray).

Bake chicken strips 10-15 or until done in the center. Warm some tortillas and build your taco, topping with sweet and sour sauce.

Monday, February 16, 2015

You Be Johnny & I'll Be June

I can't stop listening to Miranda Lambert's new album, "Platinum." I've basically had the whole thing on "Repeat" since Thursday.

It's just...so...good.

It's keeping me upbeat throughout this crazy weather and lack of sunshine.

You what else is good though?

A pasta dish that doesn't make you feel like you weigh 6,000 pounds WHILE it's busy being pretty delicious.

I made this weeks and weeks AND WEEKS ago, but just didn't get around to posting it. I found it in my phone today and thought HEY WHY NOT because wintery, rainy days just call for pasta sometimes AMIRIGHT?


I've only recently discovered egg noodles. WHY I've never cooked them, I'm not sure, but it probably has something to do with the fact that "egg" and "noodles" just don't sound appetizing AT ALL to me.

BUT --- one (very cold) night I just bit the bullet and tried them anyway because they are CHEAP and I didn't feel like eating frozen vegetables.

YES they are enriched and YES they are probably not the best for you --- but I figure a little enrichment can't be too terrible every now and then, right? Everything in moderation, I'd like to believe.

Have you ever had beef stroganoff? It's never really appealed to me, but I think I had it once in college and it wasn't too bad. This version is made with turkey though, as well as a few other seasonings, and it is SO MUCH BETTER. Just be sure to season it because you do NOT want this dish to be bland. And those mushrooms? They add SO MUCH. Please add mushrooms and you won't regret it :)


The SAUCE is the treat in this dish. It's easy and fast to throw together and really the need for those aforementioned enriched noodles is just a minimum. And THAT means we can feel a LEETLE better about eating said noodles and just enjoy the dish all around.

This all came together in about 30 minutes or less. Which COMPLETELY made up for the hour-long wait in traffic trip to the grocery store it took to make it happen.

Definitely something to consider for a rainy, chilly Monday. Happy Day, friends!


Turkey Stroganoff

((serves 2))


What you'll need:
1/2 lb of lean, ground turkey (I use 93/7)
1 small can of cream of mushroom soup
6-8 small mushrooms, rinsed and chopped
1/2 cup sour cream
1/2 tsp garlic powder
1/2 tsp onion powder
1 tsp extra virgin olive oil
dash of basil and oregano (or Italian seasoning)
salt and pepper, to taste
Tony's (or other cajun seasoning), to taste
1-1.5 cups of cooked egg noodles

What you'll do:
Saute' mushrooms in olive oil with garlic, onion, and Italian seasoning. Once mushrooms are fully cooked, remove and add turkey. Turn heat to medium, season with salt and pepper, and cook until completely done, about 10-15 minutes. Turn heat down to medium-low and stir in sour cream and cream of mushroom soup. If sauce is too thick, add a little water or chicken broth until it reaches your preferred consistency (I like mine slightly soupy). Season with Tony's or other seasoning to taste, then serve hot over warm egg noodles.


Monday, February 9, 2015

Sunday Shrimp & Grits

Is anybody else completely obsessed with "Uptown Funk"?

I can't help it. I'm hooked. It's basically been the thing that's getting me through this manic Monday!

But it's all good. Because you know what ELSE I'm currently hooked on?

Shrimp and grits.

Thaaaaaaat's right.

I'm cooking again!

Actually, I cook A LOT. I've just been really boring as of late.

So whether it's the 60+ -degree weather and sunshine we had this weekend, or just that I got tired of eating chicken, SOMETHING reallllly motivated me to get a little creative in the kitchen.

Okay let's face it - it was Pinterest.

I LOVE shrimp and grits. It's one of my favorite dishes to order when we go to legit seafood restaurants down on the Coast. Nobody does shrimp and grits like the South, people.

But I've never really attempted to make it myself. I've made a version or two with a few other fun ingredients added, but guess maybe I was just afraid it wouldn't be the same? Plus, when I want shrimp and grits, I REALLY WANT SHRIMP AND GRITS -- so to get all pumped about making it and eating it -- and then have it NOT turn out? Well, that's just heartbreaking.

But yesterday was different. Oh, so different. I'd found the recipe via Pinterest on Saturday night and it was all I could think about come Sunday morning. My tastebuds couldn't take it anymore, folks.

So, after church we threw some thinks in a skillet, cooked some grits, and hoped to goodness it would taste all right. And you know what?

It was a pretty fantastic recipe.

...although I'll spare you the horror of my photography skills, because it's really hard to make shrimp and grits look pretty with an iPhone camera and bad lighting ;)

You can find the original recipe here, courtesy of Southern Living Magazine (speak to my heart!), but I put my own spin on it below. It actually calls for very practical ingredients - I had basically everything on hand already except the shrimp.

Careful, though -- this dish is super filling! It's nice and cheesy and starchy and seafood-y all at once. And it's wonderful :)

Happy Monday, friends!


Sunday Shrimp & Grits

((adapted from Southern Living Magazine))
((source))

Serves 4

What you'll need:

2 slices of turkey bacon
1 lb of medium-size shrimp (I used frozen, fully cooked, de-veined, tail-on shrimp)
1/4 cup flour (I used self-rising, and it worked fine)
1 cup mushrooms, sliced
2 tbsp extra virgin olive oil
1 cup low-sodium chicken broth (plus a little more, just in case)
garlic powder
pepper
salt
Tony's

Grits:
1 cup Quick Grits
1 can low-sodium chicken broth
1/2 cup milk
1/2 cup half-and-half
1/2 cup shredded, mixed blend cheese (I used the "Pizza Blend")
1/2 cup shredded mozzarella cheese
2-3 slices Provolone cheese.
dash of salt
dash of pepper
dash of Tony's

What you'll do:

In a large, non-stick skillet, heat about a half tablespoon of oil to medium heat. Cook the bacon until crisp, then set the strips aside (drain on a paper towel if needed, but turkey bacon typically isn't very greasy). Do not clean the skillet.

Saute the mushrooms in the bacon drippings (if any), adding about a teaspoon more oil if needed (you can also add just a small pat of butter here). Sprinkle with pepper and garlic powder to taste. Cook until tender.

If needed, clean/defrost/de-vein/de-tail shrimp, then season with salt, pepper, and Tony's to taste. Dredge in flour, then add to skillet to cook with mushrooms.

When shrimp begin to brown, add chicken broth and season to taste. Let this mixture cook for about 5 minutes, then turn heat to low. This should be very gravy-ish, but not too liquid-y. If it gets too dry, add a little more broth until it reaches the right consistency.

Serve piping hot on top of grits.

For the grits:
Combine broth, milk, and salt in a medium saucepan and bring to a boil over medium-high heat. Mix in the grits a little at a time, stirring with a whisk. Once everything is combined, turn heat to low and let this cook for about 10 minutes, stirring occasionally, or until thick.

When grits are fully cooked, add in the cheese and season slightly with Tony's as you stir.

Once everything is evenly combined, spoon grits into your bowl and top with mushroom and shrimp mixture. Crumble bacon on top and enjoy!


Thursday, January 15, 2015

Crawfish & Corn Bisque

My friend Tony is HOT.

He's also tall.

And Southern.

And a HUGE help in the kitchen.


You totally saw that coming.

Don't mind me. It's the end of the day and I'm kind of struggling with productivity right now because THIS is how I feel:


I don't really hate everyone. Just pants right now, I think. But really. Can we all agree that this crazy-cloudy-cold weather calls for stretchy pants and oversized shirts only?

I just re-read that sentence and WOW I sound like a slob. But Christmas is over, a new year is here, and I'm MORE THAN READY for my 75-99 -degree weather. Bring on SUMMER and sunshine!

Anyway. Back to Tony the Kitchen Boyfriend.

Was that weird? Let's just go with it.

One of the best things about this cold weather is the requirement to stay in and eat soup at night. I've made more soup over the past two months than I have all year. LOVE.

I've only made this twice this year, because crawfish is out of season and therefore $$$$$$ --- but when I DO make it, it lasts us for at least 2 meals (with seconds).

This is actually my sister's recipe - she made this years ago for an event at our church and I VIVIDLY remember one of the older men of the church telling her: "Honey, if you make this for any man, he will be yours for LIFE."

She got married in April last year. I guess it worked.

The other key ingredient in this dish? Behoooooollld the Crab Boil:


You can get this in either liquid or powder form - either works fine. I prefer the liquid but bought the powder when my grocery store was out. But be careful -- just a little bit of this stuff goes a LONNNG way. You won't be sorry! :)

And BONUS: If your crawfish is already thawed, this comes together EASILY in under 15 minutes.

I don't have a pretty picture of this dish because we always INHALE it. But trust me on this, okay? 

This dish reminds me of home. AAAAAAND it's going to knock your socks off. JUST YOU WAIT.


Jenn's Crawfish & Corn Bisque

Serves 4-6

What you'll need:
1 lb of frozen crawfish tails, thawed (or fresh, if they are in season)
1 stick of butter (I use 3/4 stick)
2 cans of cream of potato soup
2 cans creamed corn
1 pint half and half
1 tbsp of chopped onion
1 tbsp of chopped green onions
1 capful of liquid Crab Boil (or 1 tsp of powder form)
Tony's, to taste

What you'll do:
Saute' onion and green onion in butter until clear. Add crawfish tails and continue cooking for 2-3 minutes. Add cream corn, potato soup, half and half, and crab boil, stirring after each addition. Sprinkle with Tony's, then simmer for about 20 minutes.


Monday, November 10, 2014

Hot 'n' Spicy Outlaw Chili

Iiiiiiiiiiiiiit's NEW RECIPE TIME!

The evening (and early-morning) temps are dropping - making it the perfect weather for this Hot & Spicy Outlaw Chili. Hubs and I tried this over the weekend and we both agreed it was a success :)

Despite my smokey photography skillzzzzzz.


But first! A backstory.

About a month or so ago, my office had a day of friendly food competition. People divided up into teams, chose a food and theme, then had half of a workday to decorate an area of the office and prep their food (the aroma was incredible). Then, everyone in the office had the chance to walk around and sample each food and vote for our favorites.


It was a delicious day, indeed.

So delicious that I had to collect a few recipes here and there, as well. This chili being one of them.

Side note: When asked about the "Outlaw" part of the name, the sweet ladies on the team simply responded: "Because it's so hot, it should be illegal!"

Please also note that they were dressed in lady cowboy hats and vests as they said this, as well.

They were just too cute.

I usually use lean ground turkey meat when I make chili (see my recipe here!), but this time I opted for lean ground beef since the original was sooooo good when I tried it at work.


There is no doubt in my mind that this was the ultimate supper to warm us up on a cold weekend night. ESPECIALLY since we topped our chili with cheese, sour cream, and FRITOS!


PLEASE tell me this brings back everyone else's memories of Frito Chili Pie as a child! This dish DEFINITELY took me back to the days of junior high where we'd walk after school to the tiny little diner across the street to get $2 Frito Chili Pies after school.

And there we'd devour them with pink lemonade until our moms could come pick us up.

...around the corner.

Because that's what all the cool kids did. AND STILL DO!***

Now go make somebody (and your tummy) happy and MAKE THIS!

Loooooooove.


Hot 'n' Spicy Outlaw Chili
courtesy of the sweet ladies' team at work :)
Feeds 4-6 hungry folks


What you'll need:
2 lbs. ground beef (I used 80% lean)                                                   
1 tbsp garlic powder                                 
1 can diced tomatoes
1 can diced Ro-tel Tomatoes
1 or 2 cans Bush’s Chili Hot Beans
1 can of red kidney beans
3 heaping T. chili powder                                           
2 heaping T. ground cumin
½ - 1 tsp cayenne pepper (more if you’re brave)     
1 tsp oregano
1 can of low-sodium beef stock
1/2 cup of water (or more, depending on your preference of consistency)
1 large onion, diced
Salt and black pepper to taste

What you'll do:
Saute onions in a small amount of oil in a large skillet or Dutch oven until they are clear and tender.  Then add ground beef, and cook until browned.  Add garlic powder and cook, stirring constantly, for about 1 minute.  Drain well and dab excess grease with a paper towel.  Add remaining ingredients and bring to a boil, then lower heat and simmer for ~ 2 hours. Check occasionally, and if the consistency is too clumpy, add more water 1/4 cup at a time - until you reach your preferred consistency.*


*I prefer my chili a little soupy, but not watery. So add water (or not) until your heart's desire. It's up to you!

***That tiny little diner is STILL there! Still in business and infested with tons of junior high kids every day. Memoriessssssss.....

Wednesday, September 10, 2014

Homemade Mashed Potatoes

This is me today:


My arms are sore to the point I can FEEL it when I walk and, ergo, swing my arms!

I understand you, Raquel Welch....I understand you. Do not be ashamed!

Today's workout kicked my hiney. No joke. More sprints, more 45-pound bar in the weight room - YIKES! (no complaints, I love it!) But regardless, it felt GREAT (later. MUCH later) and it feels even greater knowing that after tomorrow's session, we're done until Monday! Whoop whoop!!!!

However, right about now all I REALLY want to do is curl up in bed with a book, some music, and THESE wonderful mashed potatoes.


The photo does no justice, you HAVE to believe me on this.

Since starting this new (read: intense) workout program, my appetite has been a little whack. It usually happens when I have to adjust to a new change in routine. Chicken sounds dry, veggies make me cringe, bread scares me, etc. (I'm weird) And while I do get hungry, nothing ever sounds appetizing.

Except for cake. Always cake.

HOWEVER, after getting home later than usual on Monday evening, ALL I could think about was warm mashed potatoes fresh off of the stove.

Even though we've been eating on the lighter side, we figured it would be okay to splurge on some 'taters as long as we racked up on veggies, too. So we paired it with some (unpictured) steamed zucchini squash and lean grilled chicken and all was right and happy with the world again.


My belly was all "OMG WHAT?????!!!" and begged for more. But I had to resist (a little)!

It's such a simple recipe that it seems silly to post, but it's always a hit with us as well as our families. It may take a bit of grunt work on the prep side, but it's totally worth it for smooth, creamy, perfectly mashed potatoes. Enjoy! :)


Homemade Mashed Potatoes

Serves 2-4


What you'll need:
3 medium to large potatoes
2 tbsp milk (more if you want them smoother and less chunky)
1-2 tbsp cream cheese
2-3 tbsp butter (more if you like the flavor)
1/2 pack of Hidden Valley Ranch seasoning
dash of salt
dash of pepper
dash of Tony's and oregano (optional)

What you'll do:
Peel and chop potatoes into small to medium chunks, then boil until soft (roughly 15 minutes). Drain potatoes and let them cool slightly. Transfer to a mixing bowl and add remaining ingredients to taste. Smash mixture with a fork or potato smasher to desired consistency.

Ideas for other mix-ins: sour cream, bacon bits, green onions, Italian seasoning, shredded cheese (I vote  CHEDDAR) :)

Wednesday, August 20, 2014

Toasty Ham Sandwiches

Super Simple Supper Alert!

And it's delicious.

Trust me on this, okay?


WEDNESDAY IS ALMOST OVER GUYS!

Which means it's almost Thursday, so it's basically Friday right?

Definitely.

WEEKEND!!!!!!!!

Seriously CAN. NOT. WAIT.

....

But BACK TO THESE SANDWICHES!

And these incredible buns of glory!


NO that's not the name of my future workout video - it's what I call THESE BABIES:


The magic is in the bread -- I LOVE Kings Hawaiian Sweet Rolls. THEY are what really make the dish. Seriously - can we just take a moment to relish the mere SIGHT of these things?


If you've never tried these babies, please know that they will change your life and your expectations of bread forEVER. You just HAVE to.

One of my co-workers found the key to my heart a few weeks ago and handed me this recipe, declaring it was a huge hit with her family. I tweaked it slightly because I'm AWESOME like that and NO REGRETS. Hubs and I devoured them at suppertime and had to straight up put them in the fridge and OUT OF SIGHT before we ate them all.

Thankfully, we were able to devour them yet again at lunch the next day. If ever there was a sandwich you'd want to eat again and again, believe you me THIS IS IT.

Am I being slightly dramatic considering this is a SANDWICH? And a MINI SANDWICH at that?

Probably.

But just you wait 'enry 'iggins. Just. You. Wait.

You'll fall in love too.

Toasty Ham Sandwiches

Serves 2-4
(leftovers for 2)

Pack of 12 dinner rolls (King's Hawaiian if you're awesome)
1/2 to 3/4 stick of butter or margarine, melted
1 tbsp dijon mustard
2 tbsp Worcestershire sauce (<- how DO you say that?)
1/2 tsp black pepper
1/2 tsp onion powder
1/2 tsp garlic powder
1-2 tbsp poppy seeds (your preference)
1 pack of thinly sliced honey ham
1 pack of provolone cheese

Spray a baking pan or casserole dish with non-stick spray or lightly rub with a little butter/margarine. Separate rolls and line pan with the bottom portions - rolls should be close together. Layer with ham, cheese, then more ham. Top with the top layers of bread (it's okay if rolls are touching!). 

Mix remaining ingredients, then pour evenly over rolls. Back at 350 for roughly 15 minutes or until cheese is melted. Dinner is done!

Fun option: Spread dijon mustard on the rolls before layering ham and cheese. YUM!


I want them IN MY BELLY.

Friday, February 28, 2014

A Cajun Treat: Crawfish Pie

Boy do I have a recipe that's going to knock your socks off.

I'm not even kidding! Crawfish season only comes once a year - and in the South it's a HUGE DEAL. Fortunately you can usually find it frozen in the off-season, unless you're like me and live in The City and have had withdrawals for almost 3 years now!

I'm so serious when I tell you the only thing on my Christmas list last year was that my mom buy frozen crawfish for me the next time she saw it in the store.

And ohhhhh she did.


Best Christmas ever.

My tastebuds have been begging - downright BEGGING - for this Crawfish Pie recipe for months now, and last week I finally broke down, dug out the ol' New Orleans cookbook, and defrosted one of the packages of crawfish tails.

I'm saver, not a spender!

It was soooo worth it. A warm, fluffy crawfish mixture baked into a flaky pie crust -- YIKES I may have to make this again!


If you can get your hands on some crawfish {fresh or frozen}, the rest of the ingredients are really practical and things you probably have on hand already.

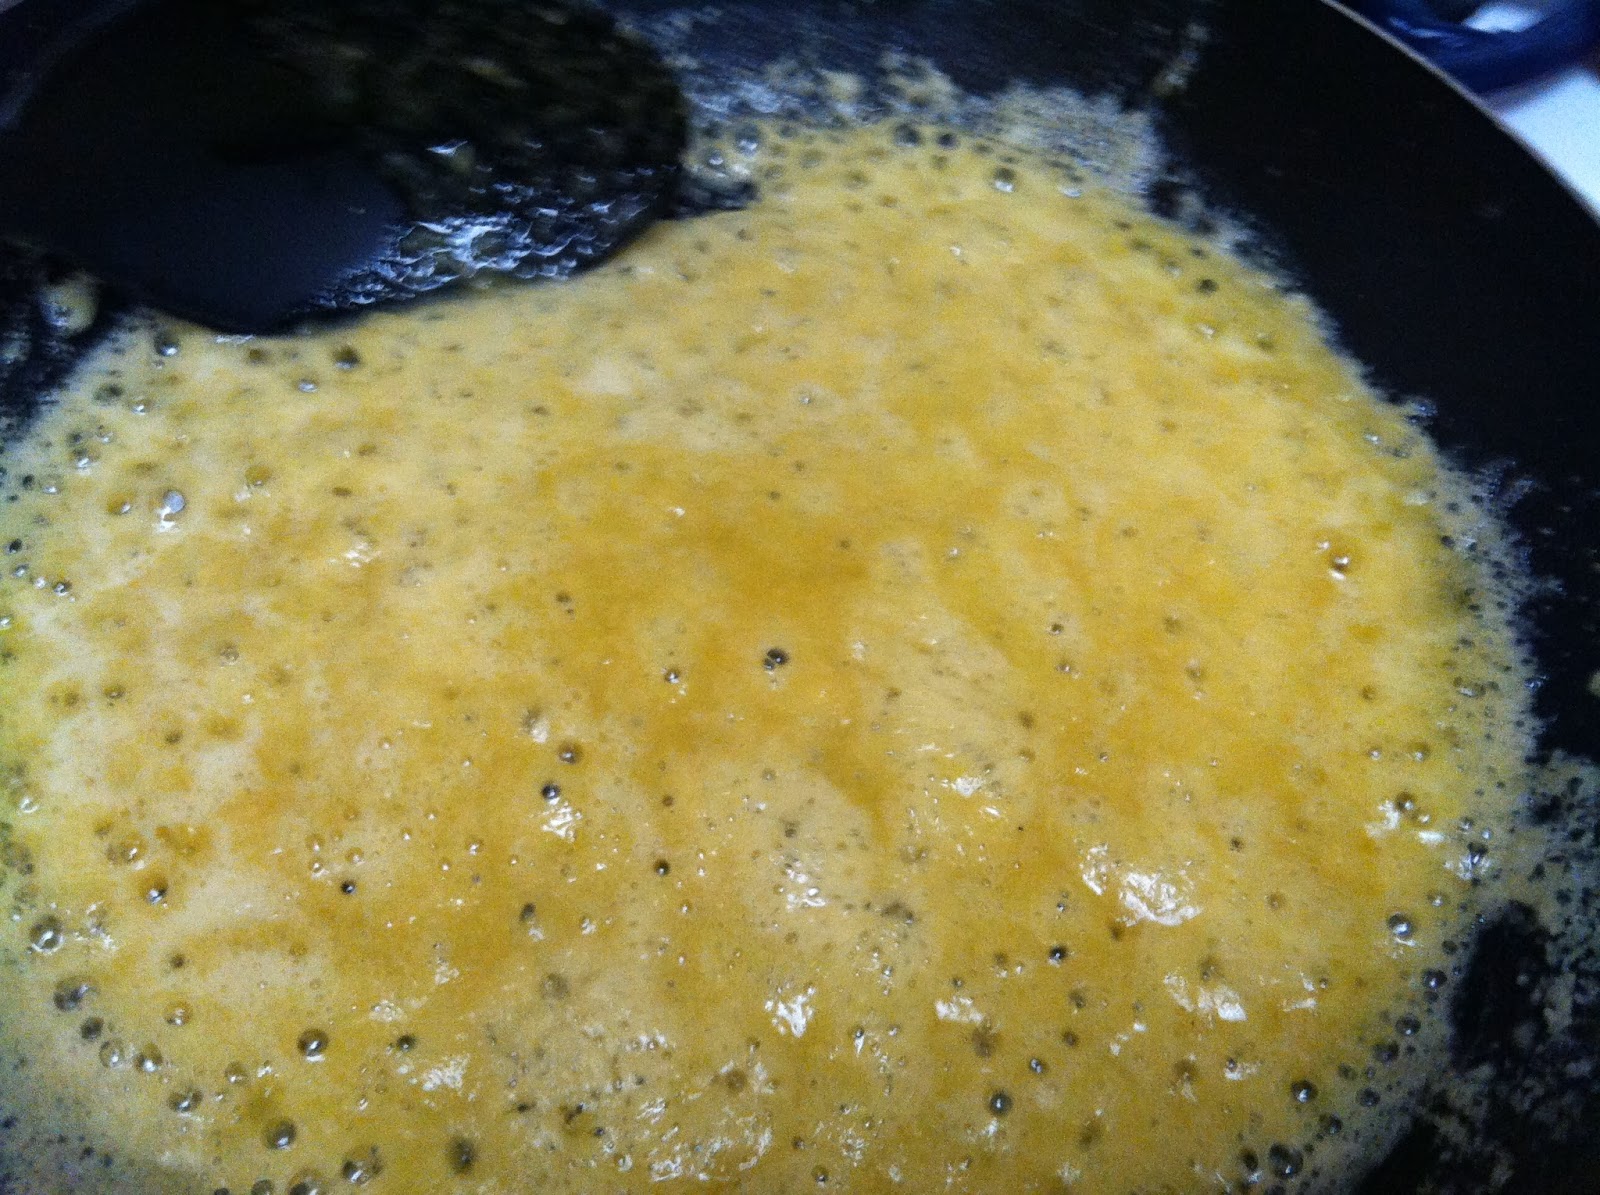
The trick is to get a good roux going once you start cooking. It's just a simple mixture of butter and flour over low heat until it's a nice golden brown:


Looks gross and bubbly, right? That's when it's ready! This will be the base of your mixture, and from there you can add in all of your seasonings, veggies, and crawfish!

I can't even begin to describe how this made my night. It doesn't look that pretty, but I guarantee you the taste is amazing. My mouth is watering all over again!


Mmmmm....


MMMMMMMM!!!!


Hope you enjoy this, folks. It's filled with all sorts of Cajun goodness.


Crawfish Pie

Adapted from The New Orleans Cookbook
Serves 2-4


What you'll need:

1 stick butter
1/4 cup flour
2 tsp chopped onion (or onion powder)
2 tsp garlic powder
1/3 cup chopped green pepper
2 tbsp parsley
2-3 stalks of celery, chopped
2 tbsp chopped green onions (optional)
1 tsp salt
1 tsp pepper
1/4 cup heavy cream or half-and-half
1 package frozen crawfish tails (or ~1 lb fresh crawfish)
1 frozen pie shell, thawed
Cayenne pepper, to taste
Tony's, to taste


In a heavy non-stick skillet, melt butter over low heat. Add flour a little at a time, cooking slowly and stirring constantly - DO NOT walk away, as this will burn very easily! Continue stirring until a light golden roux begins to form. Add the onion, garlic, green pepper, parsley, green onions, and celery, then continue stirring until vegetables are soft. Add salt, pepper, cayenne, cream and continue to stir.

Add crawfish tails to the mixture and cook until they are tender, which may take between 12-15 minutes. Pour mixture into pie shell and bake at 350 until crust is a nice golden color and filling is slightly firm.

Allow the pie to cool, but serve HOT and enjoy!

Monday, February 24, 2014

Who put the GLAD in GLADIATOR????

HERC-U-LEEEESSSS!!!!!

Don't mind me. I'm just jamming out to the Hercules soundtrack again.

An appropriate choice for a Monday, don't you think? Why yes, yes I do. I may have just been humming this out loud at work. But I'll never tell.

Want to know a secret, invisible internet friends?

"Go the Distance" is definitely my pump up song. All. the. way. Maybe it's the trumpets at the beginning. Or the lyrics. Or the little tingling noises in the background that give me butterflies.

It's not necessarily a song I would play to get pumped up right before a marathon (though fitting it may be!), or to wake up in the morning -- but on those days that just feel kind of "bleh"? Yep. The days where you just need a little pick-me-up to let you know that "NO you're not a loser! And YES YOU CAN do this!"


I will BEAT the ooooodds!!!! I can go the distance!
I will FACE the worrrrrld!!! Fearless, proud and strong!!!!!


Don't even tell me that doesn't make you stand a little straighter and feel better about life...and want to stand with your fists on your hips whilst the wind blows your hair back as you say, "Bring it, world. Bring it!"

All the Disney fans say YEAH!


Don't even get me started on Mulan, Aladdin, and others that we could talk about for days.

LET'S get dooowwwn to BIZ-NESS! To de-FEAT -- the HUUUUUUNNNSSS!!!!

...

I have a recipe for you today, people.

Whhaaaaaatttttt.

Oh yes. Despite the lack of posting, I've actually been quite busy in the kitchen as of late.


He was a NO ONE! {A ZERO! ZERO!}


I can't even count how many times we have had corn grits on our table since September. It was one of the dishes served at our wedding reception awhile back - and it was on our flight to Charleston the next day that I found the recipe and determined to make it once we got back to reality.

And oh, we did.


It's warm, creamy goodness that goes perfectly with crispy baked chicken (or fried chicken, if you dare!), green veggies, or really, any food at all. And it's oh-so-delightfully Southern.


...And an AWESOME ten-for-ten!!!!!


So, now, folks - I give you the GRITS of Grits & Griddles. Hope you enjoy!


YES INDEED!


Southern Corn Grits

Adapted from Zea's Restaurant
Serves 4


Ingredients:

1 can of low-sodium chicken broth
2 cups heavy cream (half-and-half will work as well)
1 can of creamed corn (or 1 cup of fresh corn)
Just under 1/2 cup of grits (NOT instant)
Dash of cayenne
Dash of Tony's
Salt and pepper, to taste

In a large saucepan, bring chicken broth to a boil. Lower heat slightly, then add cream and return to a boil. Slowly whisk in the grits, continuing to stir. When the grits are evenly mixed in, add the corn. Continue to stir and lower heat to a simmer. Add in seasonings to taste, or a touch of butter if desired.

Cook for 5-10 minutes, until grits are fully cooked. Mixture will be very thick. Serve hot and enjoy!

Tuesday, December 17, 2013

Christmastime's a-Comin'

Invisible Blog People!!!!

We are ONE WEEK away from Christmas Eve!!!!!

ONE WEEK away from being able to travel home to see the fam!!!!!

ONE WEEK away from eating my grandmother's pies and my mom's cooking!!!!!!

I AM SO EXCITED!!!!

I remember Christmas Eve being the most magical night of the year when I was a kid -- we'd spend all night at my grandparents' house, then on the drive home we'd look for Rudolph's nose in the sky. Inevitably, there would be some kind of plane flying up above with a red light and we would go CRAZY -- thinking OHMAHGOSH RUDOLPH IS REALLY UP THERE!!!!!

Then there was that year that I was REALLY creeped out by Santa Claus and couldn't sleep AT ALL because I was crying too hard out of fear.

I remember grilling my mom that night about HOW IS IT OKAY that some random strange old man that we've NEVER MET is going to come into our house tonight??? What if he doesn't JUST give us presents and eat the cookies??? What if he creeps around our house and stares at us while we're sleeping??? What if he touches my toothbrush??? That's just WEIRD, Mom!!!!

I think my mom said something to the effect of how she and my dad would keep the doors locked that night so Santa would have to leave the presents outside, then before we woke up they would move everything inside so we'd all stay safe that night.

I'm pretty sure it was around 3 a.m. when I had my freak-out that year (a normal bedtime for a kid on Christmas Eve), so my mom probably would have said most anything just to get me to go to sleep.

That MIGHT have been the same year as the picture with Santa where it was ONLY my sister and brother; the picture with the caption written on the back saying, "Jenny and Stephen with Santa. Lisa was scared."

No joke.

Aaaah. Memories. Gotta love 'em.


But you know what ELSE I love? Pizza.

That's right. MMM-MMM-GOOD Pizza!

And it's even better when it's healthy. #love.

Case and point:


Mmmmm...oh how I love it!

We made this dish right before we left town for our wedding, and then again last night. While it does require a little bit of prep work, it's VERY easy and tastes SO GOOD. (Note: the above photos were taken BEFORE putting it in the oven - we definitely melt our cheese in these parts!)

The twist is, this pizza has a cauliflower crust. YES, cauliflower. It's SO worth trying, even if you're not a fan.

According to the nutritionist that gave this recipe to me, the crust has very few calories and, if you load it up with fresh veggies (and NOT the gobs of cheese that we decided to throw on at the last minute ;) ), it's a MUCH healthier and lighter version that your typical take out pizza joint.


Plus, it's a VERY delicious way to get your veggies in.

We put sliced peppers, tomatoes, spinach, mushrooms, and turkey pepperoni on ours - as well as a nice mixture of cheese, obvi - and ate it with some spinach & mushroom risotto.
My belly was HAPPY last night :) :) :)


Cauliflower Crusted Pizza
12 servings

1 whole cauliflower, raw
3 eggs
1 cup low-fat, part skim mozzarella cheese
Italian seasoning, to taste
garlic, to taste

Ideas for toppings: pizza sauce, low-fat cheese, spinach, mushrooms, turkey, peppers, tomatoes, olives

Rinse cauliflower and dry completely. Finely chop the cauliflower until it reaches the texture of rice - this process is faster if you have a food processor (or a blender!). In a mixing bowl, beat eggs and add cauliflower, garlic, cheese, and a little italian seasoning. Mix thoroughly then press into a sprayed pizza pan or cookie sheet. Bake at 350 for 20 minutes, then at 425 for 12-15 minutes. Remove the crust, then add the toppings of your choice.

Bake at 425 for 10 minutes or until the crust is brown and the cheese is bubbly.

Wednesday, November 13, 2013

The First Thing I Cooked as a Mrs.

Oh boy, peoples. Winter has arrived.

Over the span of approximately two weeks we experienced some lovely Fall weather, only to grab our jackets and scarves to brave the sudden onset of winter!

It's like they say -- If you don't like the weather in Mississippi, it's okay - it'll change in a few days anyway.

But you know what? I like it. I don't mind it one bit.

It's given me reason to bust out my warm comfy clothes (hellooooo stretchy pants and hoodies!), my favorite soup and comfort food recipes, and Bing Crosby's version of "It's Beginning to Look A Lot Like Christmas."

I broke my own rule this year!!! I normally avoid Christmas music until Thanksgiving but this year --- nah! I'm taking a walk on the WILD SIDE and listening two weeks BEFORE!


Oooh....


But with the weather changing and whatnot, I thought this would be as good a time as any to tell you the story of the first thing I cooked for my husband after returning from our honeymoon:

Homemade Chicken Soup with Veggies

Not exactly what we planned, seeing as how we returned to 80-degree heat and boxes upon boxes of belongings to move into our place, but it worked.

You see, after a lovely honeymoon of things like this:


this...


and THIS...


...We both woke up in the wee hours of the morning feeling some kind of sick. The Plane Crud, as I have oh-so-lovingly deemed it.

"Juuuuicce!!!!"  The Mister said, unable to breathe through his nose and coughing up a storm. "I just need some juice!"

So off we went, at roughly 5:30 a.m., to the nearby grocery store to buy juice, popsicles, and medicine.

...only to find out it didn't open until 6 a.m.

But could we wait that long? Nope. When you're sick, you just need juice. PRONTO.

So we hit the road again, a few miles down the road to the WalMarts, which, mind you, is slightly creepy at that hour of the morning.

That's when it hit me. Somewhere in the depths of my messy box of recipe cards, I remembered there was a recipe for homemade chicken soup guaranteed to make any sick person feel better - the chef himself said so!

So about 45 minutes later, we loaded our car with WAY MORE bags than we planned (crazy WalMart curse!), and a few bottles of juice that we cracked open on the way home.

Sure, it would have been faster and cheaper to go with a can, but the over-achiever in me was NOT about to let the first thing I cooked for my new husband be a can of soup. That's for amateurs, right?

It's probably for people like us that day that were sick and just really needed soup -- and maybe I should have, but I'm not ashamed! Because truth be told, we both felt better by that evening.

And the soup was delicious. No joke.

So now that you know my little story, and now that you're feeling the first chills of the winter season, I present to you The Recipe...this homemade chicken soup sure to cure any cold you may have.

Or at least make it easier to deal with, anyway.

Even if you're not sick, it's definitely good for your tummy on cold nights. Don't be afraid to add more veggies than what the recipe calls for -- I usually eyeball it anyway. The more veggies, the better!

Just give yourself a good hour to prep/cook it, though. It's totally worth it.

...and don't forget the juice =)


Homemade Chicken Soup with Veggies

Serves 2-4 sick folks
Total time: About 1 hour
View original recipe here


1-2 boneless, skinless chicken breasts (depending on size) - cooked and cut into chunks
2 cups of low-sodium chicken broth, plus one extra cup
3 red potatoes
1 cup milk (skim is best, but whole will work fine)
1/2 tbsp of EVOO
1-2 tbsp of garlic powder, depending on taste
2 whole carrots, chopped
2 celery stalks, chopped
chopped onion or onion powder, to taste (I used about 1.5 tbsp)
1 tbsp basil
2 tbsp oregano
dash of cayenne pepper, to taste
dash of Tony's, to taste

Slice potatoes and place in a small sauce pan with chicken broth. Cook until potatoes are soft enough to mash, then remove potatoes. Stir and slightly mash potatoes in a bowl with milk (I left mine slightly chunky) and set aside.

In a separate, larger pot, place oil, garlic, onion, veggies, basil and oregano and cook until onions are translucent. If using onion powder, cook until celery and carrots are slightly soft. Add leftover chicken broth (from potatoes), stirring until thoroughly mixed. Let this mixture come to a boil, then add your milk and potato mixture. This will make the soup much thicker; if you prefer a more brothy soup, add the extra cup of broth. Let soup cook for 5-10 minutes, or until everything is evenly mixed and combined.

Add a dash of cayenne pepper and a little Tony's (helps with a stuffy nose!) and serve hot. Serve alone or over brown rice.

Wednesday, November 6, 2013

Homestyle Chicken 'n' Biscuits

Ladies and gentlemen, fall has descended upon us.


Look at that. Beee-youu-tee-fulllll.

When you live in the South - this beautiful, beautiful place - you know fall is near when the temp hits 69. When it hits 64, like today -- suddenly everything is better. People are happier, traffic is nicer (okay maybe not), everything just seems...right. Except the fact that stores have already decked their halls for Christmas. Is that odd to anyone else? But regardless...


I'm going to need fall to stick around for a few more months, yes? Yes.


I think we can all agree that with fall time comes some of the best food around. With the chill in the air and the excitement of the coming holidays and celebrations, I can't help but just want "real food."

My appetite has been wack lately - WACK, I say! Usually I'm all about the salads and the green smoothies with a side of quinoa and steamed veggies. But since the season began, all I want is the GOOD STUFF - comfort food like hearty soups and stews (thanks Natalie!!!!) and the like.

I'm even putting cheese on my veggies. WHAAATT????

I think I just like to feel warm and cozy from the inside out.

...And what better way to do that than curling up on the couch with a quilt, a Hallmark movie (or some Big Bang Theory...you choose ;) ), and a bowl of hot, fresh-out-of-the-oven Chicken 'n' Biscuits????


Oh my gracious. Just looking at it again makes my stomach growl. I've said it before, but I really, really mean it this time...THIS is comfort food at its finest.

Actually, I really, really meant it the last time I said it, too. And every other time before that.

I always mean what I say when I tell you things, invisible blog friends.

Always, always, always.

Honesty is the best policy =)


Truth? I've never made chicken and biscuits. I don't know if I've ever eaten it, honestly. I was raised a chicken & dumplins girl and thought that chicken and biscuits was just a knock off.

But no, friends. Yesterday, for some reason it was all I could think about. I had to try it. HAD TO.

And I'm not sorry.

Like, at all.

It does take a little time, but this recipe is super simple and flavorful - I actually used canned buttermilk biscuits (a rarity for me) to save time, and I won't change a thing when I make it again! It's chock full of veggie goodness, too, so you don't have to feel too guilty. It will make your tummy so, so happy - guaranteed.

As for the chicken, I used chicken legs but you could easily substitute thighs, or even skinless chicken breasts if that's what you have on hand. I highly recommend dark meat for this one, though - it really adds to the flavor of the dish.

We ate this last night alongside some broccoli that I sprinkled with garlic and baked in the oven. Delish. I highly recommend!

I hope you'll give this a try - and that it warms you up from the inside out as the temperatures begin to drop a little further :)


Homestyle Chicken 'n' Biscuits

Lightly adapted from The Novice Chef blog
Serves 4


What You'll Need:

2.5 tbsp stick butter/margarine, chopped
1 tbsp onion, chopped fine
2 tsp garlic powder (not garlic salt)
1 bag frozen veggies (I used a broccoli, cauliflower, and carrot combo), thawed
2 stalks celery, chopped
1 medium potato, cubed
2-3 chicken legs or thighs
1/2 cup flour
2 cups milk
1.5 cups chicken broth (left over from your chicken)
Small can buttermilk biscuits (I used the 5 count)
Salt
Pepper
Zero fat cooking spray or less than a tsp of butter
Paprika - optional


What You'll Do:

Place chicken in a pot with hot water, add salt and pepper to taste, then cook until completely done. Pull or cut into small pieces and set aside.

Chop potato and boil until cooked, about 10 minutes, depending on size. Meanwhile, in a separate larger pot or Dutch oven, melt butter and add onion, celery, and garlic powder. Saute for 3-4 minutes, then add your veggies: broccoli, cauliflower, and carrots. Add potato once cooked.

Stir veggies to ensure they are covered with butter and garlic mixture. Add flour and stir constantly for about 2 minutes so that everything is completely covered. Add milk a little at a time, continuing to stir until completely mixed.

Spoon in chicken broth until mixture is creamy and slightly soupy, but not to point of it becoming too broth-y. Add chicken and stir, adding salt, pepper, garlic and/or paprika to taste.

Rub a thin layer of butter on the bottom of a casserole dish (or spray with cooking spray) to prevent sticking, then arrange biscuits. Bake according to directions, but take out of oven after half the time (i.e., if directions call for 12 minutes of baking, take biscuits out after 6 minutes).

Once biscuits are halfway cooked, take dish out of the oven and pour chicken mixture on top, spreading evenly. Return the dish to oven and bake at 375 for 15-20 minutes.